62 lines
3.4 KiB
Markdown
62 lines
3.4 KiB
Markdown
Before you deploy you must obtaining the image pull key secret. After you receive the email notification that your AWS Account ID was added to the privately published AMI, continue with the following configuration, deployment and installation steps.
|
|
|
|
#### AWS Configuration
|
|
|
|
1. In the AWS console, go to AMIs and filter by Private Images. You should see a Private AMI for a zlinux/zAppliance machine.
|
|
2. Add a custom IAM Role in zic-primary-account-iam-policy.json.
|
|
For more information on how to create an IAM role, see [Creating IAM roles](https://docs.aws.amazon.com/IAM/latest/UserGuide/id_roles_create.html).
|
|
3. Ensure that ports 22 and 443 are open Inbound, as the Security Group for the ZIC management network will need them. See **ZIC Ports and Related Services**
|
|
4. Create a VPC with a subnet and use the Security Group you created for the ZIC Appliance.
|
|
|
|
#### Deploying the ZIC Appliance Deployment in AWS
|
|
|
|
1. Select the Private zlinux/zAppliance AMI and launch it.
|
|
Choose **m5a.large** as the EC2 Instance size.
|
|
2. Configure the instance details for ZIC.
|
|
- Assign the Custom IAM Role that was created for ZIC.
|
|
- Select/Configure the VPC and Subnet.
|
|
3. Use the defaults for Storage and add tags (optional).
|
|
4. Select the security group created earlier, or create a new security group.
|
|
- If creating a new security group, make sure **ports 22 and 443 rules** are added.
|
|
5. Click **Review and Launch** to deploy the ZIC Appliance.
|
|
|
|
<span class="Note">Note: To access a Linux instance in AWS you need to use PuTTY Private Key (ppk). If you are using Putty or WinSCP on Windows you must convert the PEM file to PPK format. Click [here](https://www.puttygen.com/convert-pem-to-ppk) to learn how to convert .pem to .ppk using PuTTYgen.</note>
|
|
|
|
#### Installing the ZIC Appliance
|
|
|
|
1. When the ZIC instance is running, connect to it with username "admin". No password is required.
|
|
2. Copy the zipped file to /home/admin/ on ZIC, with any tool you normally use to copy files to Linux servers (WinSCP, SCP, Termius).
|
|
3. Install Unzip using the command:
|
|
```
|
|
sudo apt install unzip -y
|
|
```
|
|
4. Install Unzip using the command:
|
|
```
|
|
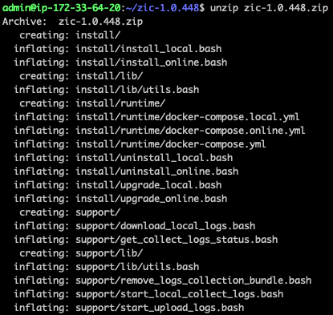
unzip zic-1.0.448.zip.
|
|
```
|
|
|
|
|
|
5. Go to the extracted directory and run the following command to allow bash script execution:
|
|
```
|
|
sudo find . -name "*.bash" -exec chmod +x {} \;
|
|
```
|
|
7. Run the online installer using the command:
|
|
```
|
|
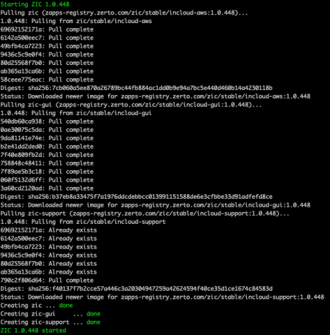
sudo install/install_online.bash
|
|
```
|
|
|
|
|
|
When the installation completes, it will display “Starting ZIC 1.0.x” and continue displaying status until it displays “ZIC 1.0.x started”. You can now connect to ZIC.
|
|
|
|
#### Connecting to ZIC
|
|
|
|
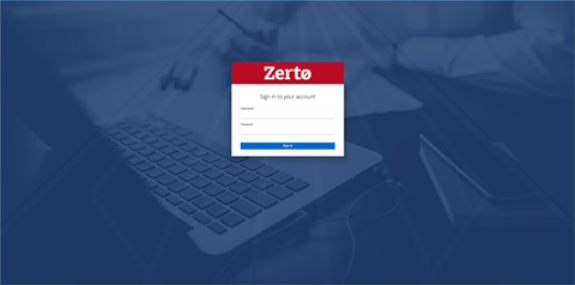
1. Connect to ZIC using the URL [https://zic-ip-address](https://zic-ip-address) to validate it is online.
|
|
2. The installer will prompt you for a username and password. Log in with the username and password generated in the ZIC download page in myZerto.
|
|
3. The online installer will pull the latest code from myZerto and perform the installation.
|
|
|
|
|
|
|
|
4. Log in using the default "admin" for both user and password for the first time.
|
|
3. At the prompt change the admin password.
|
|
|